The ongoing Coronavirus pandemic is impacting every part of our lives. Besides, it has wide-ranging ramifications for marketing, advertising and eCommerce as well as several other sectors like travel, entertainment and FMCG. As opposed to, the pandemic has defined a new category of goods called “new essentials.” New essentials are products that help consumers feel
Flutter is a UI toolkit for building applications for mobile, web and desktop from a single codebase. It is developed by Google.
We can use Rest API to process data in Flutter. Also, there is some database by which we can connect directly from the app. Cloud Firestore is one of them. We will discuss how can we connect our Flutter app with Cloud Firestore and some of its awesome features in this blog.
Cloud Firestore
Firebase comes up with a more advanced version of it which is called Cloud Firestore. It is also a NoSQL Database with a realtime feature. The difference with Firebase is its structure of data storage. Usually, realtime databases stores data in JSON tree. But in Cloud Firestore, it stores as a collection. On collection, It can have any number of Documents; these documents contain data.
Cloud Firstore with Flutter
There is a package cloud_firestore for a flutter. From https://pub.dev/, get the package to the Flutter project.
Using the Firebase Console, add an android app to the project and then follow the steps. And, download the google-services.json file and place it inside android/app after that modify the android/build.gradle file and the android/app/build.gradle file to add the Google services plugin as described by the Firebase assistant.
After connecting the Cloud Firestore to the app, we can create, read and update the database from the app.
Features of Cloud Firestore
1. Stores data as collections of documents.
Simple data is easy to store in documents, which are very similar to JSON.
Complex, hierarchical data is easier to organize at scale, using sub-collections within documents.
Requires less denormalization and data flattening.
2. Offline Support
You can use the database as offline. There is no need to worry about other things. The firestore package will handle it. When the database is connected to the internet, it will automatically sync with the firestore database. And, if the database is changed by others, the app will update it’s UI according to new data in real-time.
3. Reliability and Performance
Cloud Firestore is a multi-region solution that scales automatically.
4. Scaling
It automatically scales the database. Currently, the limits are around 1 million concurrent connections and 10,000 writes/second.
Cloud Firestore is a fast, fully managed, serverless document database that simplifies it to store, sync, and query data for mobile, web and IoT apps at a global scale.
Many times you may have wondered, “Alright I have learned the vanilla JavaScript, now which framework should I learn next”. Often after hearing features the path divides there and some choose Angular, some Vue and some prefer the React to proceed further. There are many options, but these are kind of favorite choices. When I finished learning JavaScript, I thought what should I do now. After hearing features, I chose the React. So you may ask now what have you seen that made you so keen in this area. But before that, do you know what React is?
What is React?
React is a JavaScript library which is used to build user interfaces. It is maintained by Facebook and a community of individual developers and companies.
Why Developers Prefer it
Well, first of all, it works component-wise, which makes it reusable, organized and easy to handle. It has a great community, and its popularity is growing faster. It has a JSX feature which we will learn soon and also it can be used in web applications or native mobile applications that make it versatile and efficient.
So let’s begin and create some fantastic things out of React.
Set It Up
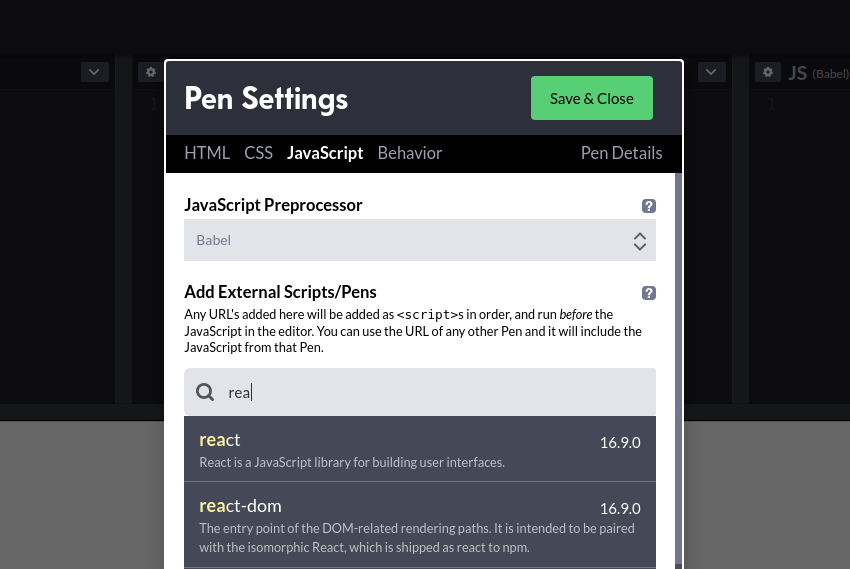
If you don’t want to set up anything, go with online tools. You can use Codepen or Glitch. You will have to import the React and React DOM from the setting. To unlock the usage of some special features and syntax, in the JavaScript preprocessor dropdown, you will have to choose Babel.
Create-react-app
If you want to use your own editor, you will have to use create-react-app. The create-react-app is an environment that is preconfigured, and it generates the boilerplate version of React application.
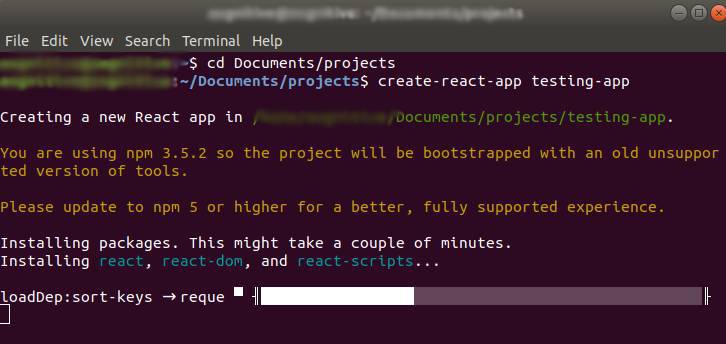
Step 1:
First of all open terminal and go to the location where you want to open your first project. Run create-react-app <project-name>
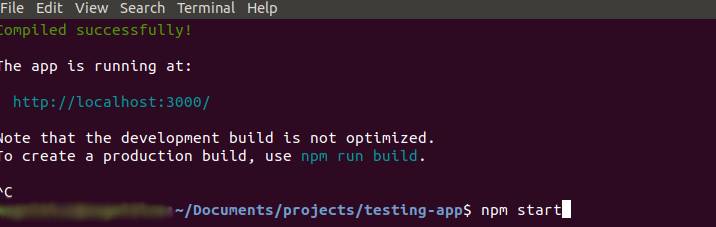
Step 2:
Next, go to the file that you have just created and run npm start in terminal.
After running npm start, you will be given a port number like below.
Click that link, and you will see this page with a nice React logo and some text. Now we are ready to dive into React.
You will have to add React Developers Tool extension. It helps to inspect certain React elements.
Did I mention?
Sometimes it doesn’t work perfectly after following step by step. In that case, first of all, update your npm and Node.js. If still, you face difficulties, let me know, I will do my best to help.
We are wrapping up for today. In my next blog, we will create our very first component, and also we will learn about JSX.
Subscribe to our newsletter
Want to receive a fortnightly round up of the latest tech updates? Subscribe to our free newsletter. No spam, just insightful content covering design, development, AI and much more.