Getting Started with LARAVEL ( Chapter 01)

By Kamrul Islam Tushar
Date: May 31, 2019
In the previous blog ( Things you need to know about Laravel in 2019) I talked about Laravel and its origin, current and future position in the Web Application/Software development field. This is going to be a small series on Laravel where I will start from the basics and in the end you will have a ready to deploy small CRUD application. As you are following the tutorial I expect you have a basic understanding of Object-Oriented Programming PHP & MySQL. So in this tutorial series, we will follow the official laravel documentation. The documentation will help guide you through if you face any difficulties. So let’s begin.
In this tutorial, we’ll learn the basics of Laravel application installation and running your first Laravel starter application.
Installation:
To start building your first Laravel application you’ll need to install some dependencies first. As the Laravel framework has few requirements So Homestead comes with all the requirements you need to work on your Laravel application. Homestead is an official virtual machine for Laravel. In the next tutorial of this series, I’ll discuss everything you need to know about it. So, for now, will just stick to the most simple one. I am using Ubuntu but You may use any OS you prefer. Because Everything is almost the same. So there’s no need to panic.
As we are not using Homestead for this part of the tutorial, So you need to make sure you have PHP and its extensions installed on your local computer. Therefore I am assuming you have a basic understanding of PHP you should have PHP and its extensions installed on your system.
Now you need to install Composer on your machine. So to install composer just open up your terminal, type in the following command and press enter.
Installing composer:
php -r "copy('https://getcomposer.org/installer', 'composer-setup.php');"
php -r "if (hash_file('sha384', 'composer-setup.php') === '48e3236262b34d30969dca3c37281b3b4bbe3221bda826ac6a9a62d6444cdb0dcd0615698a5cbe587c3f0fe57a54d8f5') { echo 'Installer verified'; } else { echo 'Installer corrupt'; unlink('composer-setup.php'); } echo PHP_EOL;"
php composer-setup.php
php -r "unlink('composer-setup.php');"
After installing composer run the command below to install composer for Laravel globally on your system.
Run composer to check whether the composer is installed properly or not.

composer global require laravel/installer
Once you are done installing composer you are ready to create your first Laravel starter application.
To create your first Laravel application run composer create-project --prefer-dist laravel/laravel crud. On this command “crud” is the name of the application. You can type any name you prefer instead of crud. As I prefer to create all my applications inside a folder to keep everything organized, So For me it’s inside the Documents/projects folder. So I will CD into the folder and run the command to create the application.
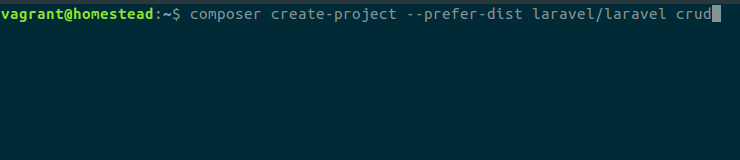
After successfully running the command composer will start setting up a fresh Laravel application in your Documents/projects folder. And it will look like this.

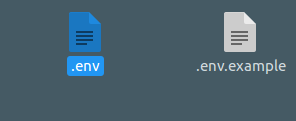
The next thing we need to do is to generate a unique application id for your Laravel application. To do that first you need to open up your GUI file explorer go inside your folder and copy .env.example to .env . It should look like this.
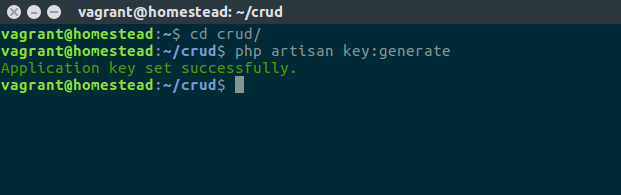
Now run php artisan key:generate from CLI tool/ terminal inside your project directory.
Now you are ready to run your application. And to do that type and enter php artisan serve from your terminal.

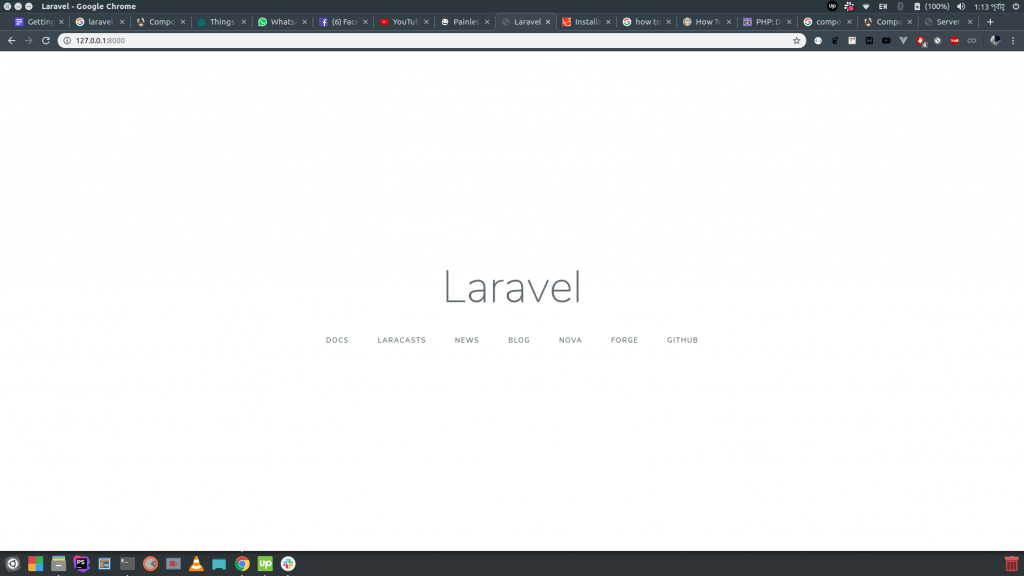
And voila! your app is running on this local IP address. On my case which it’s running on http://127.0.0.1:8000 . Now open up your favorite browser and type in the url http://127.0.0.1:8000 .
Congratulations! your application is ready to rock and roll.
This is just a basic laravel application so there’s not much to it. So in the next tutorial, we’ll Install Homestead and discuss how to use homestead with your laravel application. Connecting MySQL database and folder structure of laravel.


